My Sourdough Journey
My soul purpose of writing this blog is to get others baking sourdough, or helping others with a few tips to help their sourdough journey, more easily than my first few months of failures.
Someone asked, why sourdough on my photography blog…good question…I’m just pleased that there has been interest in my sourdough journey on my photography page…people want to know more and I would be super doper pleased if people took up the sourdough baking for their own joy, satisfaction and health benefits…plus it is still connecting my outback life with everyone and to me that is a bonus, my pleasure and joy.
I love the science and the history of sourdough.
Ancient Egyptian society is credited with the discovery of sourdough bread processes; however, evidence of yeasted bread was also discovered near Bern in Switzerland said to date back 5000 years. Thanks, Google, for that bit of information
To me that screams “don’t reinvent the wheel”
Just remember cooks 5000 years ago would have very basic cooking utensils and wouldn’t haven’t even thought about hydration ratios…so if they did it so can you.
Sourdough is called the first leavened bread, the first fermented bread.
My biggest advice to anyone starting their sourdough journey or struggling with it is KISS…keep it simple superstar …if you start reading anything sourdough …first up that I noticed it is a whole different language…that was a bit of mind blowing experience for me at first…looking up what words I haven’t ever used before (while baking) and what they actually meant…use it if you want…I haven’t…but I do understand what it means.
It’s logical, any skill/industry has their own language…the way we talk in the cattle industry anyone outside of it would most likely not understand the terminology…how builders talk, their tools of the trade and ways of doing things would have different wording. What I am saying for those of you that may have baked before…sourdough experts, have a totally different language to what you have heard in a layman’s basic baking wording…you don’t have to get bogged down in it.
Some sourdough experts go in deep, with moisture percentages, hydration ratios might be the correct sourdough wording…the opportunity to do this is there if you want, but you don’t have to.
What you have in your kitchen now, if you are a half handy cook, is all you need to start. You can improvise a lot of equipment you need, until you work out for sure if you want to purchase gear just for sourdough.
I struggled the first few months…following recipes to the letter…the doughs were often far too wet…but stubbornness and determination, researching, asking questions and first and foremost getting back to basics got me to where I am today with this sourdough journey…still learning, still making mistakes but absolutely loving and enjoying the results. I liken it to my photography journey.
I hope by sharing what I have learnt so far, I can start you off somewhere close to where I am today. With yourself learning and enjoying the process as you go.
What made me so keen to make good sourdough was the simplicity …well the fact that flour, water, salt could create such a great tasting food and all the other yummies you could bake from sourdough starter.
Some concise pointers about sourdough from @healthyhomesteader on Instagram … “It is also good for gut health, easy to digest, highly nutritious, rich in protein, gluten sensitive people can consume (maybe not true celiac)”
It’s all to do with the natural fermentation …wild yeast…when the flour, salt and water works together in the right temperature…it is just magic to watch and absolutely yummy to eat.
The basics you will need to start your sourdough journey
* Jar/s with a wide opening and the same circumference from top to bottom, are very useful …but any clean jar to start you off is all that is needed
* Big rubber band or string
* A wooden spoon/stirrer…even the handle end of your wooden spoon may work, a dough hook or Danish dough whisk is handy but not needed
* A spatula or plastic bowl scaper
* A metal bench scraper will be handy and helps a lot, you can get away with not having one, but it is one thing that does help.
* Rice flour…you use it to help shape the dough not ordinary flour. If you have rice, and a thermomix or blender, make your own. You also use rice flour to dust the tea towel or banneton lining.
* You do need a scale that measures in low amounts of grams…and if the scale has the tare back to zero function, that would be beneficial…everything is measured in grams, the starter, water, flour, salt
* Mixing bowl (I have found ceramic better than metal, but if you have nothing else than metal, no worries)
* Glass bowl with lid or cover (I use a saucepan lid)
* Good quality bakers flour
(this is a must, I use Wallaby unbleached bakers flour, 99% Australian, high in protein, about $14 per 5kg) I also use multi grain, wholemeal and rye flour with the unbleached bakers flour
* Water…filtered no doubt works best, I use rain water that has been boiled/heated…I use tepid water…aka lukewarm, wherever it says water in my sourdough recipe…I no longer measure the temperature of the water like some sourdough recipes suggest you do
* Salt…I use Olsson’s sea salt
* Baking paper
* You don’t need bannetons first up, purchase them later if you wish …just use a bowl/cake tin with a tea towel as the liner …for shaping
* A really sharp knife to score the dough…a razor blade and lame are marvellous but not needed first up
*good oven mitts …I bought myself BBQ gloves after a while, as I use my Weber to bake the bread in…they are so worth it
* Some sort of baking dish with a lid. Cast iron is perfect. Dutch Oven. Enamel dish and lid. If you have nothing else, just use a glass oven proof bowl with a lid for baking.
* An oven, Weber, open fire
* A probe thermometer would be handy but not necessary when first starting off
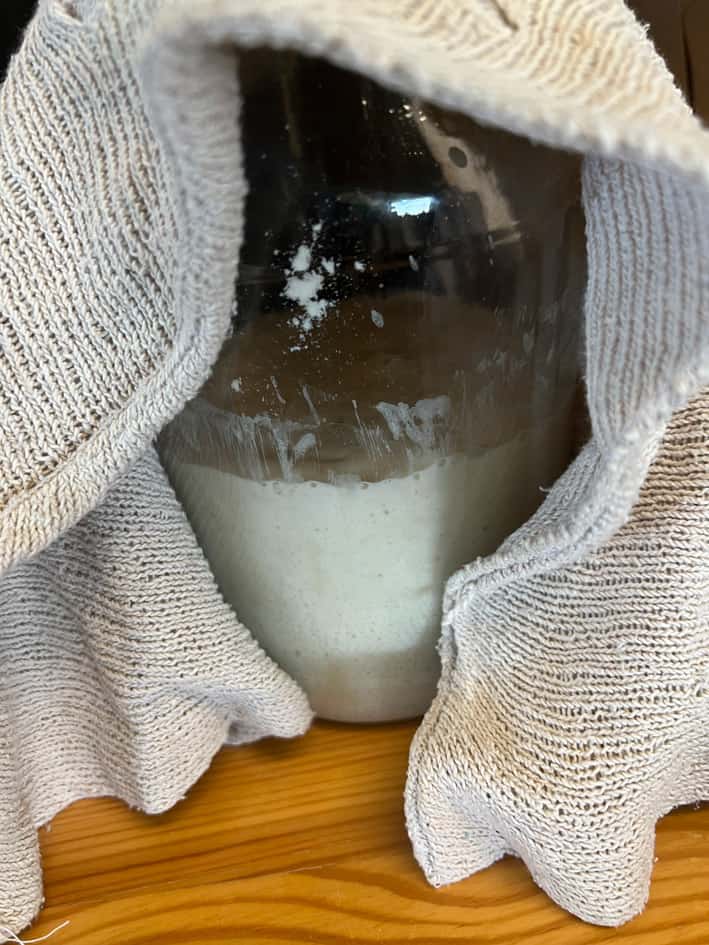
Starter
Flour, water and salt is what the starter is made of…it takes about 7 days to get to the point of being able to use the starter….this process for me was truly enjoyed. Poor Claire was being bombarded with photos of every stage of the process…I was extremely excited at my flour, water and salt doing its thing in the jar over this period.
Beginners+Sourdough+Guide+(1).pdf If you can’t open that link Homegrown Education has it on their website homegrowneducation.org…this family live in the United States.
Some very handy tips in their pdf, and the method I used to make my own starter that I am still using today. My Mother Load as I call it. I did try their sourdough recipe, but it didn’t work for me.
You can buy starter at several places in Australia including @sourdoughstarter.com.au
I did try one of their sourdough starters …made it my rye flour starter…I no longer have it, but it did work.

Inspiration
There are literally 100s of people out there giving advice on how to make sour dough …use #YouTube as a good place to search and learn.
The Food Geek on #YouTube I found some useful tips from …his science can be “heavy” but I can appreciate that as you can learn from that to have the knowledge as to how it works…he talks hydration ratios like a professor …his recipe is 593grams of bread flour, 148 grams whole grain flour, 15 grams salt, 148grams of sourdough starter and 496grams of water…I kid you not …he makes wonderful bread, but this recipe didn’t work for me …and for someone like me that sort of precise measurement and amounts just doesn’t work.
I did try the @ballerinafarm on Instagram recipe also, again far too wet for me…but awesome Instagram handle to follow, not only for inspirational sourdough posts…the family live in America on a beef and pork growing farm.
@gracieclifford and @mammarevolution on Instagram were true inspirations for me on my sourdough journey…both Aussie ladies …one living overseas…but they basically broke it down to basics…my kind of language “give the dough curry” Gracie…and Sara doesn’t even use the bench to shape the dough, she does it in the air, less mess she reckons “I’m not opening a bakery” …huge sigh of relief from me, after everyone else being so precise about the whole procedure…I was measuring the temp of the water and painstakingly making sure it was spot on before adding…something I had never done in all my years of cooking…I don’t do that anymore. The recipes I did that with didn’t work for me anyway.
I am not dismissing that temperature has a HUGE part to play in sourdough cooking. You must know your environment…we are talking fermentation…seasonal temperatures in my Outback Queensland home are hugely different to someone cooking sourdough in Brisbane, Melbourne, England.
I’ve always had a strong starter…the room temperature sure has a lot to do with it, to get that starter doing its thing, to get activated and to work in the dough…25 degrees is apparently the sweet spot temp, to make all things happen.
My doughs last summer were getting too big too quickly, which I thought was magic at the start, but they lost all their strength, ate up all the goodness in the dough, the strength in a dough is truly needed. In other words, a wet sloppy mess that you can’t work. Silly me putting the dough on the veranda when I should have kept them in the air conditioning.
Recipe
I use Gracie’s recipe and a combination of Grace’s and Sara’s methods.
Gracie’s recipe (I double every time)
100g activated starter
210g tepid water
10g salt
400g Flour
Activating Starter
To make this next part not so confusing (hopefully)…the starter (Mother Load) you have created (using flour salt and water) needs feeding to make it an “activated starter” required in the recipe…adding flour and water to your starter is known as feeding it and this makes it active.
The measurements or ratios you can use to feed your starter I have mentioned below…these aren’t in the recipe above…just the amount of activated started needed…then you can work out the ratio of starter/flour/water you need to make the required “activated starter” for the recipe.
To prepare to activate my starter I usually get my Mother Load starter in its screw lid jar, from the fridge in the evening to sit on the bench overnight
Tip: have a dish of water whenever you mix anything to do with your sourdough. Dip in the water whatever utensil (or hands) before you mix with it/them.
Tip…before measuring your starter into another jar to feed it, give your starter a stir in its jar.
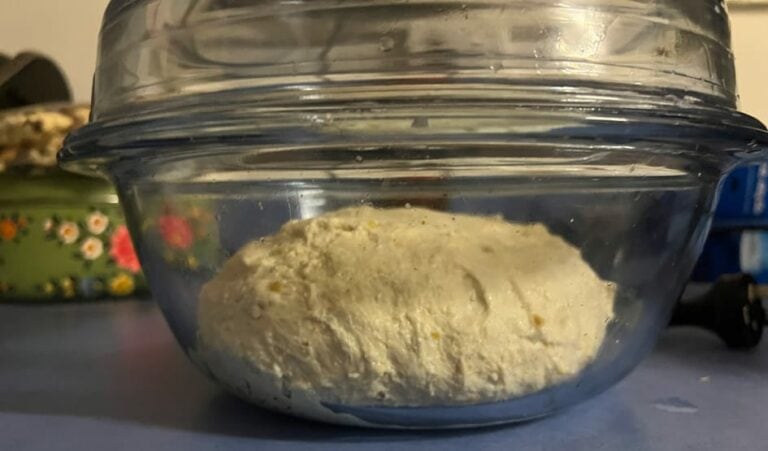
In the morning I activate my starter with flour and tepid water. I measure and mix the starter, flour and water into a big enough jar so the starter has room to double.
The variation of this ratio…starter, flour, water… can vary hugely.
Remember the flour and water measurement you are feeding your starter, must always be the same.
So to make 100g of activated starter you may use 50g starter 50g flour 50g water 1:1:1 ratio …or you could use a ratio of 50g starter, 350g flour, 350g water 1:7:7 if you want to give your starter a bit of a kick start or need a lot of starter for cooking (plus you would need a big jar).
Or you could use any ratio in between the 1:1:1 and 1:7:7 (or more) as long as the flour and water are the same measurement.
The more you use your starter, the better you will become at working out what ratio works for you…making enough for the recipe you are using and having some left over for the next sourdough bread you bake…or making extra to use in other recipes with sourdough starter (discard)
I find if I use more flour/water ratio it makes the starter work …doing its magic, activating all the goodness in the mixture…makes it ferment better.
For example I use 400g of activated starter…I double Gracie’s recipe and I usually make two loaves …so I could do 50g starter, 200g flour, 200g water 1:4:4 ratio or I could do a 100g, 200g, 200g 1:2:2 ratio
(maybe the #FoodGeek explains hydration ratios better than me)
It depend on what ratio you used and what temperature your jar of starter is in as to the time it takes to activate.
Once you have mixed your starter, flour, water in the jar use a rubber band to show its starter point level.
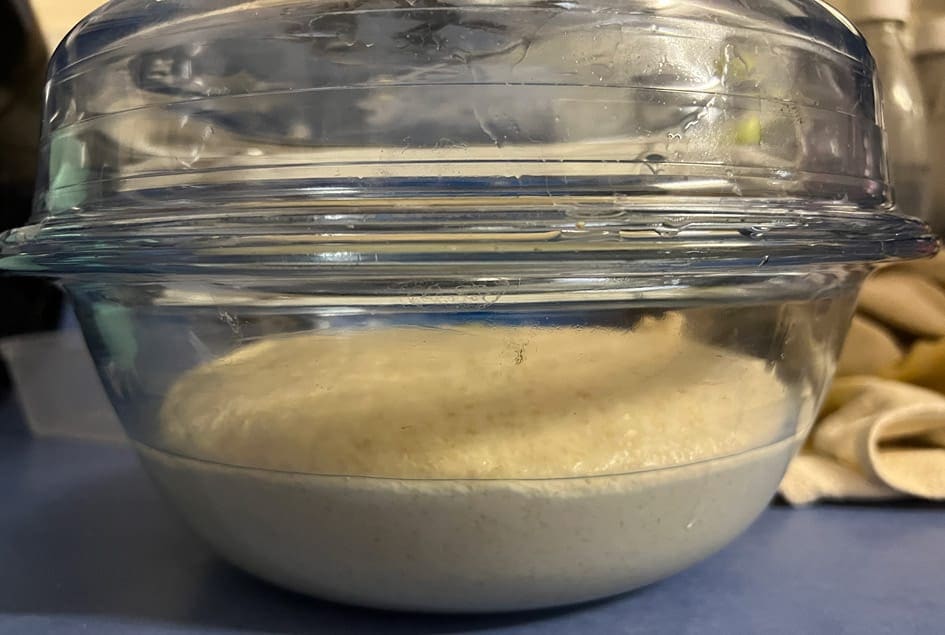
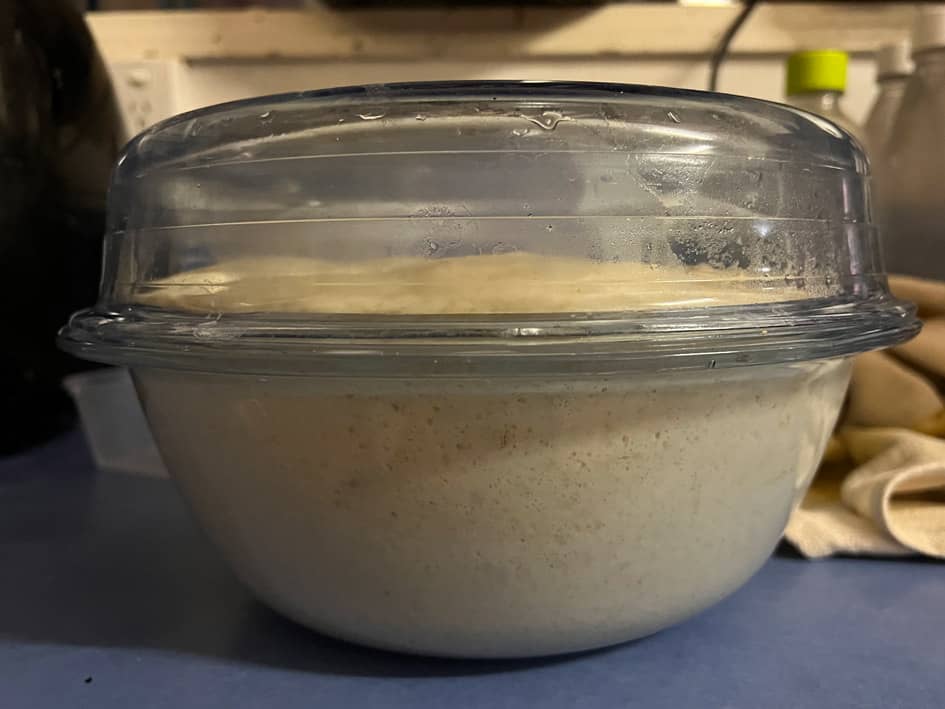
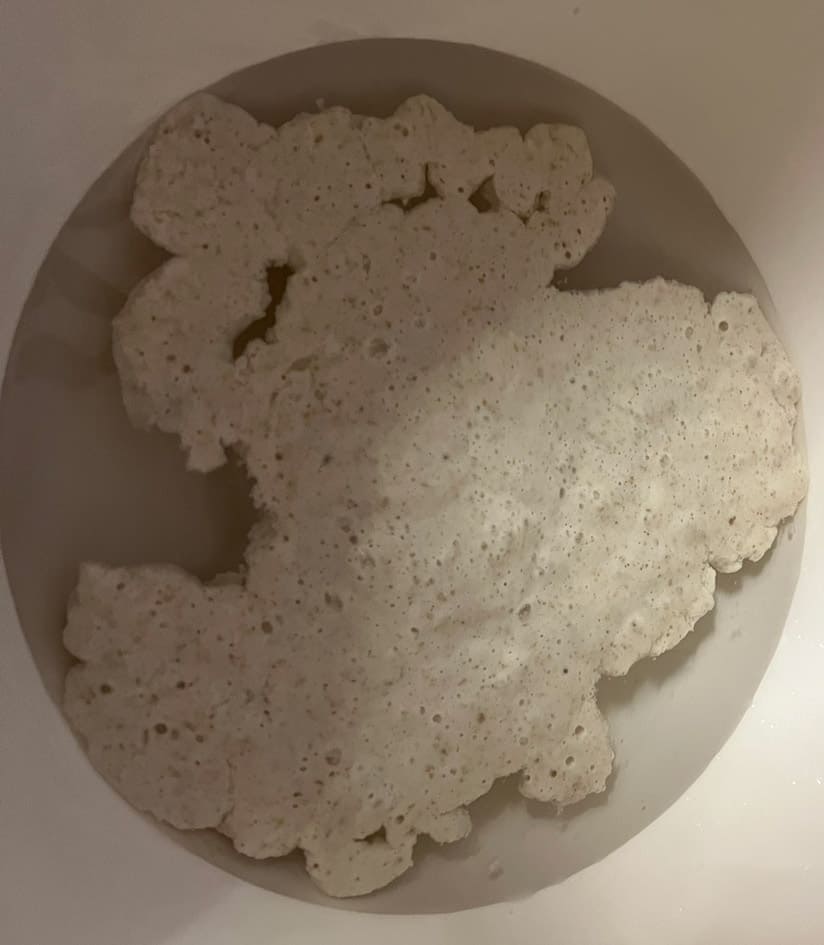
If it doubles, or near doubles and it seems very active (lots of bubbles) drop a teaspoon of the mixture in a glass of cold water, if it floats it is good to go.
Your starter must be used when it is ready otherwise it will deflate…it has eaten up all the goodness in the mixture.
Some may still use the deflated active starter…I haven’t been game…if I forget to check mine, and it deflates, I just feed the mixture again with flour and water. So, you can use it if you wish…it is classed as “activated” if it at least doubles in size, and/or has been very active.
Gracie’s original recipe actually says 100g starter (activated in the last 10days)… so go for it if you wish.
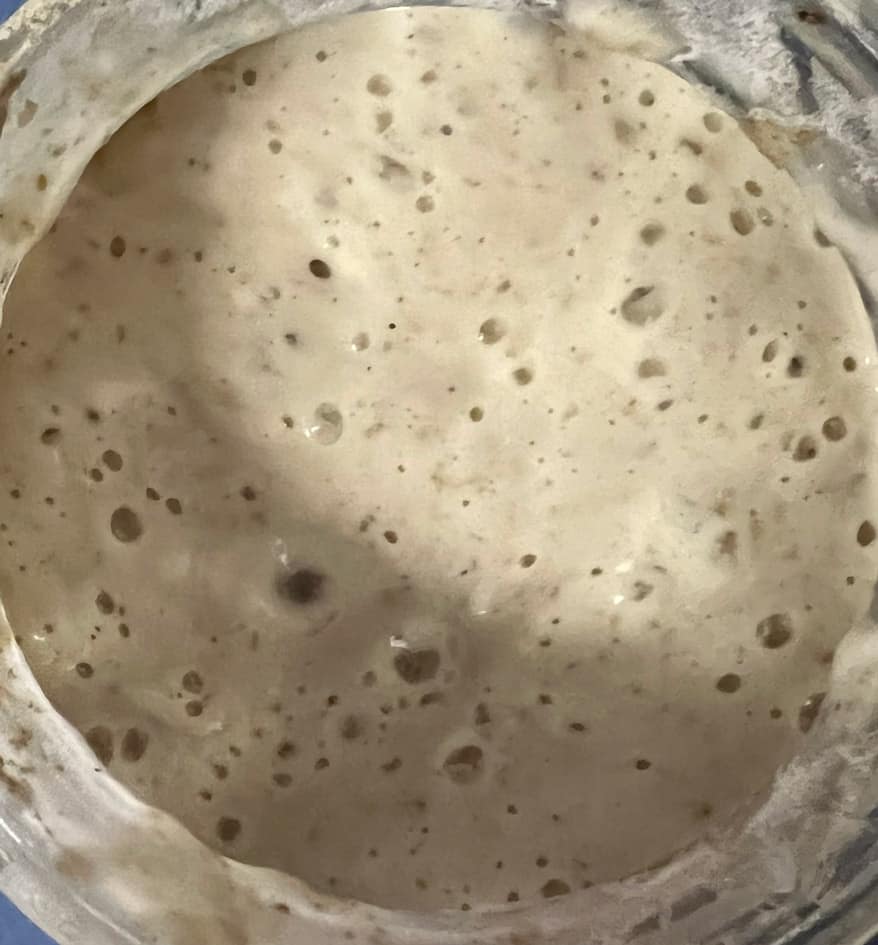
I find my activated starter, along with the bubbles has a really good smell to it…a wild yeast smell…a good fermented odour.
Activating Starter
To make this next part not so confusing (hopefully)…the starter (Mother Load) you have created (using flour salt and water) needs feeding to make it an “activated starter” required in the recipe…adding flour and water to your starter is known as feeding it and this makes it active.
Tip…before measuring your starter into another jar to feed it, give your starter a stir in its jar. Remember to wet whatever you are stirring it with first.
The measurements or ratios you can use to feed your starter I have mentioned below…these aren’t in the recipe above…just the amount of activated started needed…then you can work out the ratio of starter/flour/water you need to make the required “activated starter” for the recipe.
To prepare to activate my starter I usually get my Mother Load starter in its screw lid jar, from the fridge in the evening to sit on the bench overnight
Tip: have a dish of water whenever you mix anything to do with your sourdough. Dip in the water whatever utensil (or hands) before you mix with it/them.
In the morning I activate my starter with flour and tepid water. I measure and mix the starter, flour and water into a big enough jar so the starter has room to double.
The variation of this ratio…starter, flour, water… can vary hugely.
Remember the flour and water measurement you are feeding your starter, must always be the same.
So to make 100g of activated starter you may use 50g starter 50g flour 50g water 1:1:1 ratio …or you could use a ratio of 50g starter, 350g flour, 350g water 1:7:7 if you want to give your starter a bit of a kick start or need a lot of starter for cooking (plus you would need a big jar).
Or you could use any ratio in between the 1:1:1 and 1:7:7 (or more) as long as the flour and water are the same measurement.
The more you use your starter, the better you will become at working out what ratio works for you…making enough for the recipe you are using and having some left over for the next sourdough bread you bake…or making extra to use in other recipes with sourdough starter (discard)
I find if I use more flour/water ratio it makes the starter work …doing its magic, activating all the goodness in the mixture…makes it ferment better.
For example I use 400g of activated starter…I double Gracie’s recipe and I usually make two loaves …so I could do 50g starter, 200g flour, 200g water 1:4:4 ratio or I could do a 100g, 200g, 200g 1:2:2 ratio
(maybe the #FoodGeek explains hydration ratios better than me)
It depend on what ratio you used and what temperature your jar of starter is in as to the time it takes to activate.
Once you have mixed your starter, flour, water in the jar use a rubber band to show its starter point level.
If it doubles, or near doubles and it seems very active (lots of bubbles) drop a teaspoon of the mixture in a glass of cold water, if it floats it is good to go.
Your starter must be used when it is ready otherwise it will deflate…it has eaten up all the goodness in the mixture.
Some may still use the deflated active starter…I haven’t been game…if I forget to check mine, and it deflates, I just feed the mixture again with flour and water. So, you can use it if you wish…it is classed as “activated” if it at least doubles in size, and/or has been very active.
Gracie’s original recipe actually says 100g starter (activated in the last 10days)… so go for it if you wish.
I find my activated starter, along with the bubbles has a really good smell to it…a wild yeast smell…a good fermented odour.
Activating Starter
To make this next part not so confusing (hopefully)…the starter (Mother Load) you have created (using flour salt and water) needs feeding to make it an “activated starter” required in the recipe…adding flour and water to your starter is known as feeding it and this makes it active.
The measurements or ratios you can use to feed your starter I have mentioned below…these aren’t in the recipe above…just the amount of activated started needed…then you can work out the ratio of starter/flour/water you need to make the required “activated starter” for the recipe.
To prepare to activate my starter I usually get my Mother Load starter in its screw lid jar, from the fridge in the evening to sit on the bench overnight
Tip: have a dish of water whenever you mix anything to do with your sourdough. Dip in the water whatever utensil (or hands) before you mix with it/them.
Tip…before measuring your starter into another jar to feed it, give your starter a stir in its jar.
In the morning I activate my starter with flour and tepid water. I measure and mix the starter, flour and water into a big enough jar so the starter has room to double.
The variation of this ratio…starter, flour, water… can vary hugely.
Remember the flour and water measurement you are feeding your starter, must always be the same.
So to make 100g of activated starter you may use 50g starter 50g flour 50g water 1:1:1 ratio …or you could use a ratio of 50g starter, 350g flour, 350g water 1:7:7 if you want to give your starter a bit of a kick start or need a lot of starter for cooking (plus you would need a big jar).
Or you could use any ratio in between the 1:1:1 and 1:7:7 (or more) as long as the flour and water are the same measurement.
The more you use your starter, the better you will become at working out what ratio works for you…making enough for the recipe you are using and having some left over for the next sourdough bread you bake…or making extra to use in other recipes with sourdough starter (discard)
I find if I use more flour/water ratio it makes the starter work …doing its magic, activating all the goodness in the mixture…makes it ferment better.
For example I use 400g of activated starter…I double Gracie’s recipe and I usually make two loaves …so I could do 50g starter, 200g flour, 200g water 1:4:4 ratio or I could do a 100g, 200g, 200g 1:2:2 ratio
(maybe the #FoodGeek explains hydration ratios better than me)
It depend on what ratio you used and what temperature your jar of starter is in as to the time it takes to activate.
Once you have mixed your starter, flour, water in the jar use a rubber band to show its starter point level.
If it doubles, or near doubles and it seems very active (lots of bubbles) drop a teaspoon of the mixture in a glass of cold water, if it floats it is good to go.
Your starter must be used when it is ready otherwise it will deflate…it has eaten up all the goodness in the mixture.
Some may still use the deflated active starter…I haven’t been game…if I forget to check mine, and it deflates, I just feed the mixture again with flour and water. So, you can use it if you wish…it is classed as “activated” if it at least doubles in size, and/or has been very active.
Gracie’s original recipe actually says 100g starter (activated in the last 10days)… so go for it if you wish.
I find my activated starter, along with the bubbles has a really good smell to it…a wild yeast smell…a good fermented odour.
You only need 50g of starter stored away for next time…or whatever is left over from the activated starter. You store this in a jar with a lid, in the fridge or on the bench top if you wish…again depending on environment temperature and how often you plan to use it.
You can use excess starter, called discard, in many recipes. Store it in a jar in the fridge to use later. If you find a liquid on top of the discard just pour that off with a bit of the starter and it is good to use.
If I get my starter activation ratio right, I can usually count on about 4 hours for it to be ready to use.
Don’t despair if your starter doesn’t activate aka hardly increases in size. Give it another feed of flour and water (same ratio each) …yes you will have excess starter, but it won’t go to waste…and usually it is all the starter needs to get it activated.
Once you have your activated starter
I measure the tepid water into a bowl, then add the activated starter and then the salt. I mix that up and then I add my flour.
Since I double Gracie’s recipe I use 500g Wallaby flour, 100g mixed grain, 100g wholemeal, 100rye flour…or whatever flours I have besides the Wallaby flour that compliment it to make up to 800g.
I mix this roughly, first with Danish dough whisk and then my hands (remember wet everything first)…it should roughly bind together nicely.
It is best that the dough is not too wet.
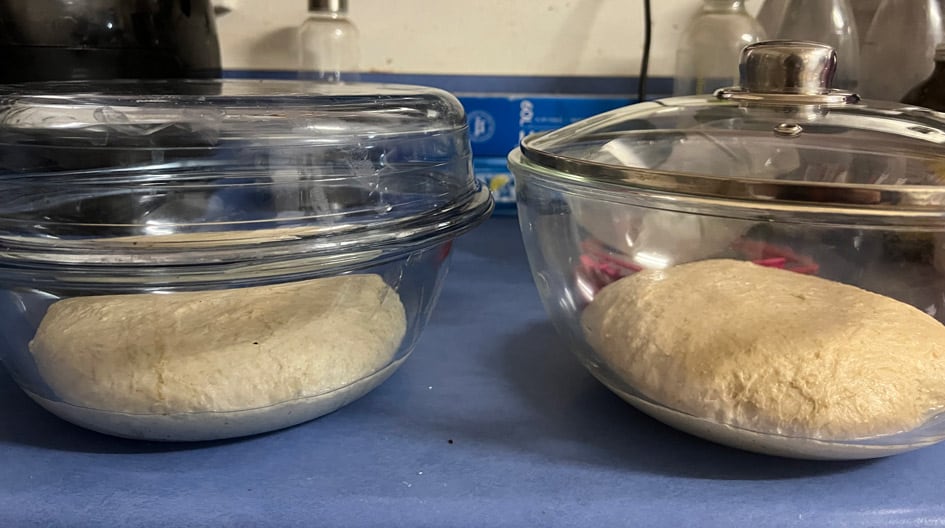
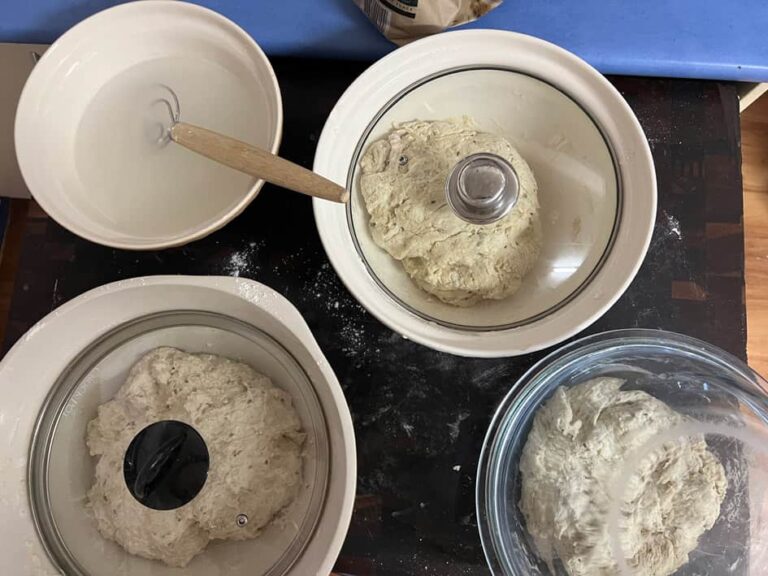
I leave the rough mix in the bowl covered with a lid (I use a saucepan lid) for about half an hour…if it is left longer it is no big deal.
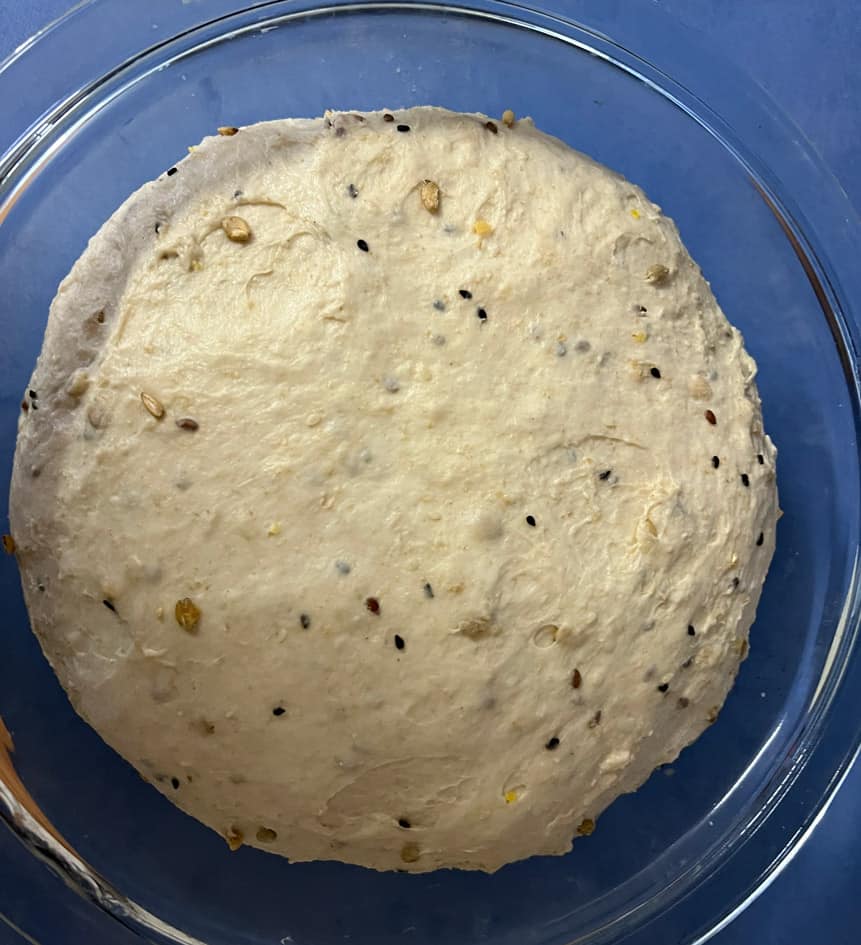
I then, as Gracie says “give it curry” …I pull/stretch part of the outside out, and then fold it into the middle, “stretch and fold” while turning the bowl around, pulling out and putting in the middle…I do this 20-30 times…it should become a smooth, strong dough…then I bash it into the bowl, holding one end and basically throwing the other end into the bowl…pick up the other end and do the same…not using the bench, so not making a mess… you can give it curry for as long as you feel you want, just the above actions on repeat…and then “stretch and fold” again, to make a ball and place that in a wet glass bowl, cover with a lid, and leave it on the bench. This is called bulk ferment.
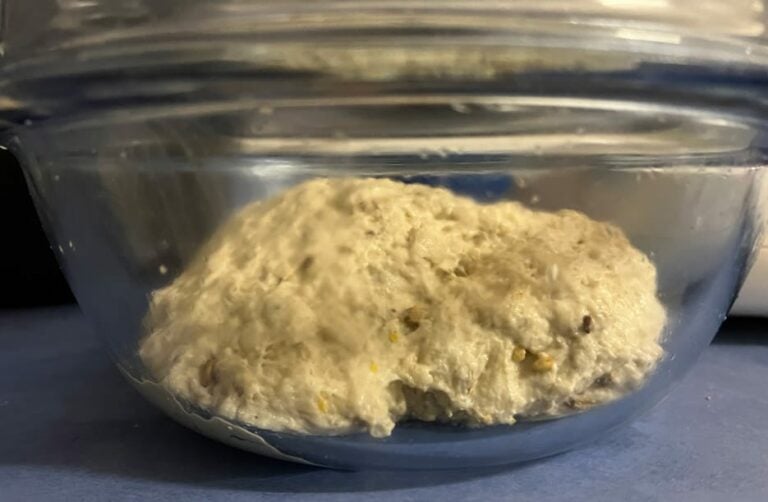
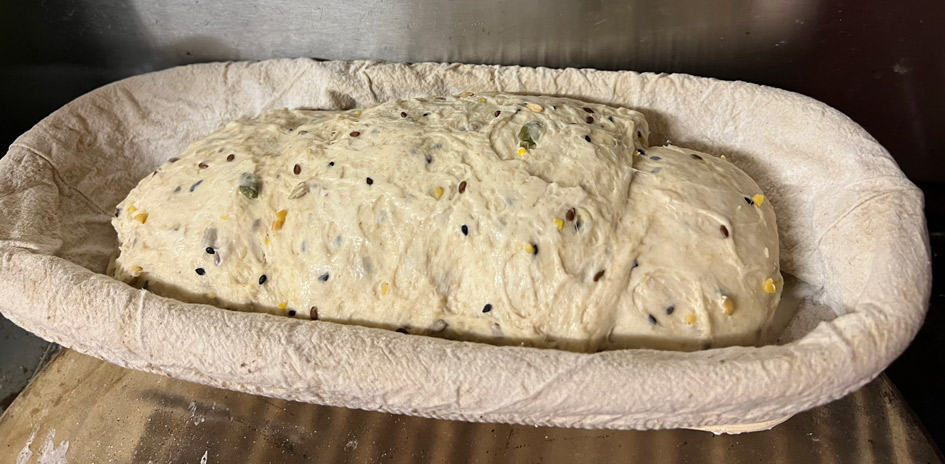
I let that expand 20-50%. If I am lucky this will happen around dinner time at night and I can then shape the dough on a board covered in rice flour and put it in a banneton or bowl, with the liner or tea towel covered with rice flour. I then cover the dough with a shower cap (a tip from BallerinaFarm) you can use anything similar (Gladwrap/big plastic bag) and place in the coldroom/fridge for what they call cold proofing.
I will let the #FoodGeek show your how best to shape your dough. As I said earlier he is heavy into the maths, ratio, hydration of sourdough and no doubt you will learn heaps from watching his videos, as I did, especially the shaping…but there is no need to get bogged down in the maths…me personally I don’t think, now that I’m producing loaf after loaf of really good sourdough and I went back to keeping it simple, as the ladies I learnt from did also.
I must say, getting that surface tension right is needed and satisfying. Note he uses no rice flour…but he has a glass/marble top surface to work on…I’m using a wooden board.
https://www.youtube.com/watch?v=IxVSlizlt-s
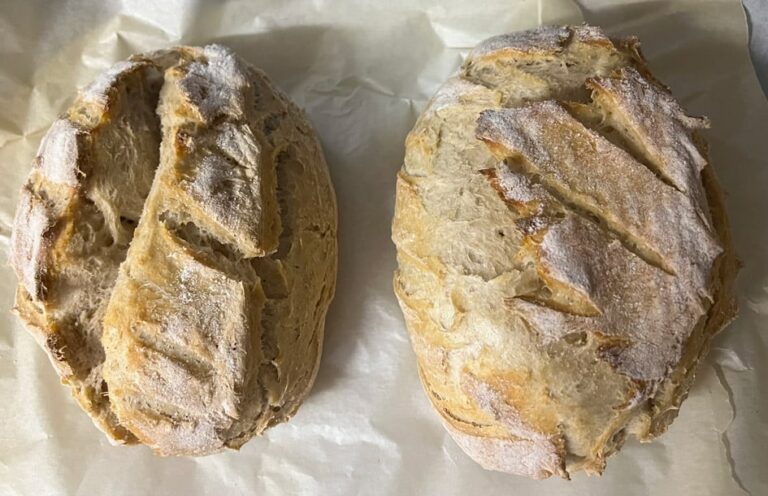
You can work out if you make round or oval loaves…it may depend on the containers you have for shaping, or it just maybe a preferred shape.
You can apparently leave the dough cold proofing in the fridge for up to 36hours before baking. I would say 24hrs would be playing it safe, as I would assume it would start losing its goodness. I usually do my baking the next afternoon, so it is around 16 hours cold proofing…but I have done is sooner and later than this. I believe you can bake straight away if you wish…but at least half an hour cold proofing is suggested.
It is best to preheat whatever you are baking your bread in first and for your “oven” to be around 220-240 degrees celsius.
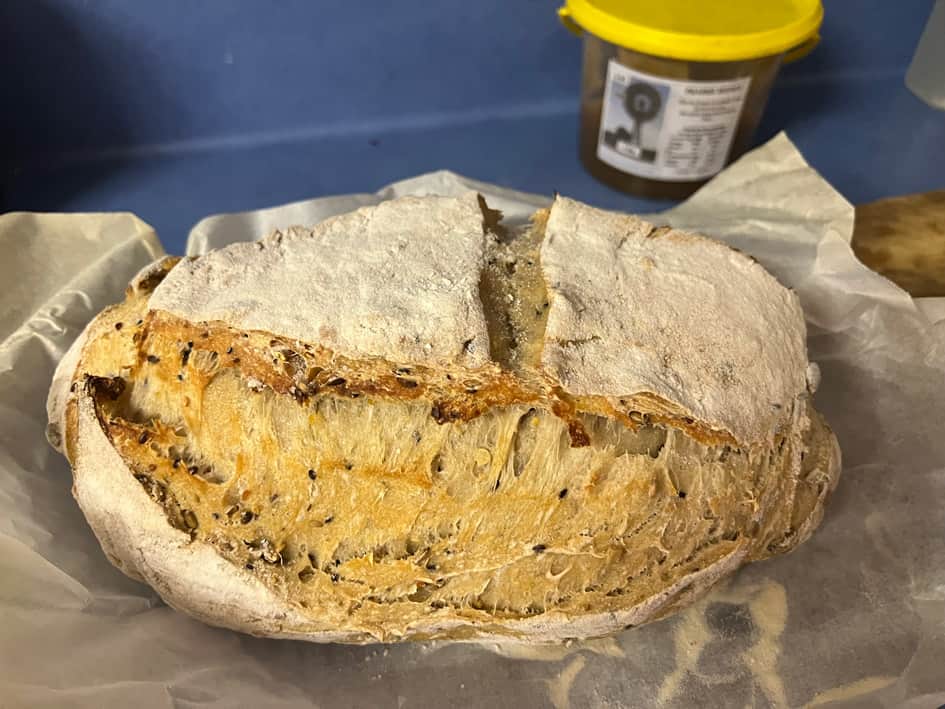
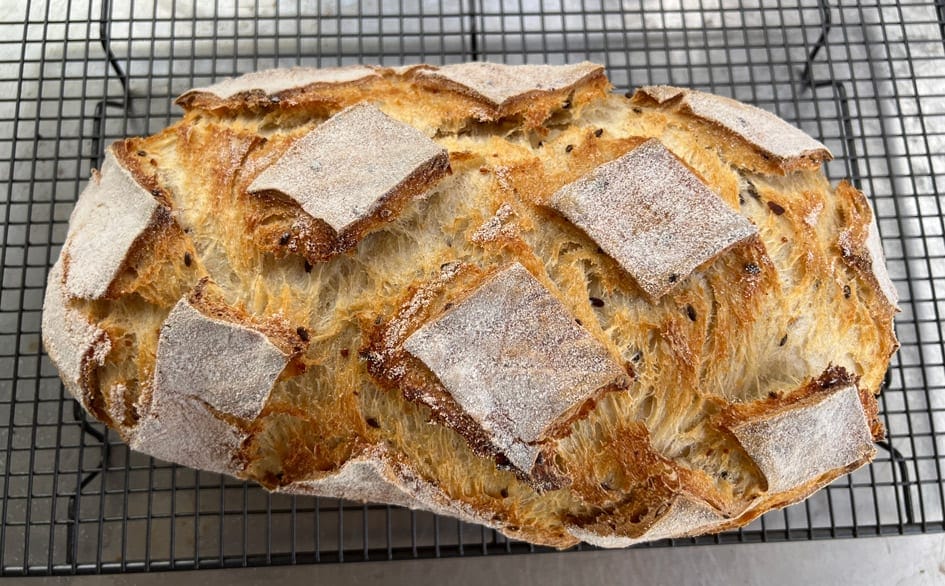
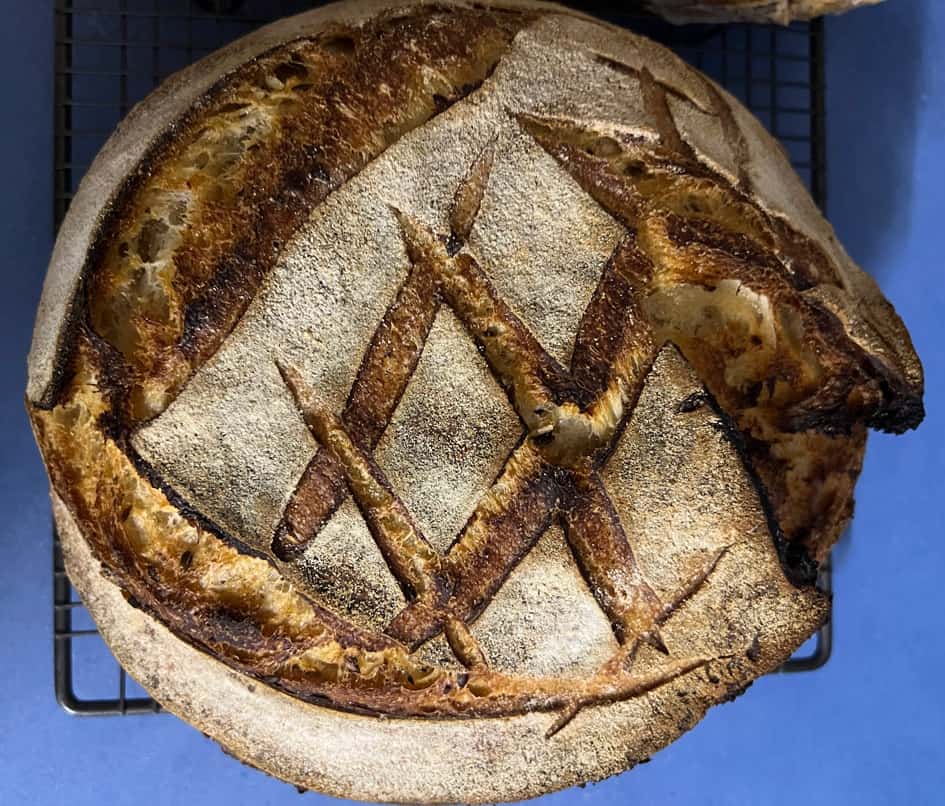
Tipping the cold proof dough onto baking paper that has been folded into three or four layers…the rice powder covering the bottom of the dough might be enough but you can dust it again with rice flour if you like…then score the dough with a sharp knife or lame (razor blade)…you need one large score, otherwise the bread with burst open naturally.
So, a cut at one side of the dough from the top to bottom is needed. You can make decorative markings on the top if you wish…I do both…and they help the bread expand without bursting which the bread will naturally do.
There are hundreds of YouTubes showing some very decorative score marking if you wish to perfect this art.
You then pick up the baking paper and dough, place it in the heated pot, replace the lid and bake.
With the quantity of Gracie’s recipe she suggests baking 25mins with the lid on and 5mins with the lid off.
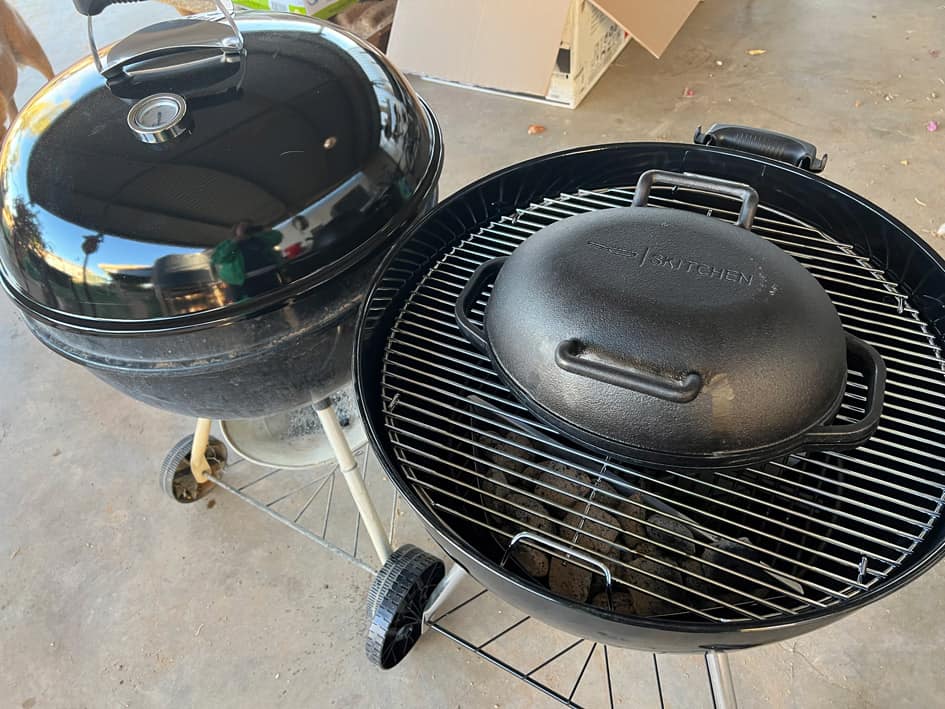
I use my Weber and Brisbane Pot and I find with the doubled recipe it takes 45mins and the loaf is usually nicely browned and at the cooked temperature of sourdough, 97 degrees celsius.
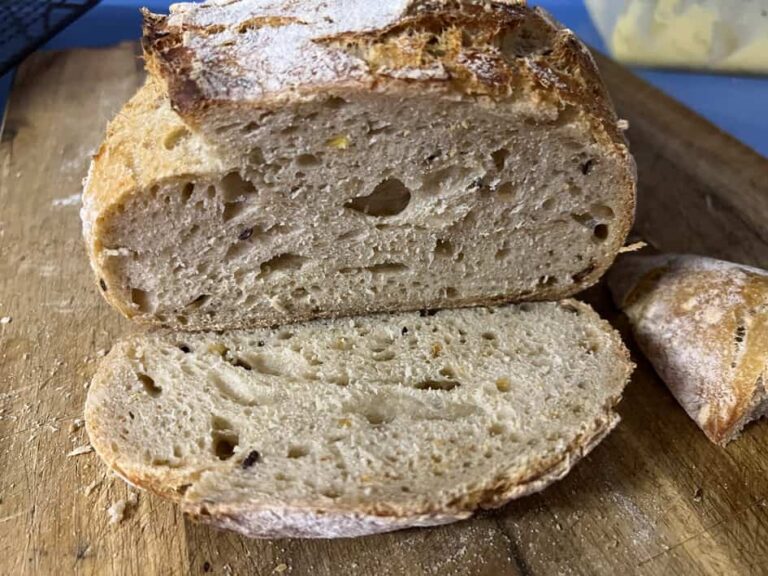
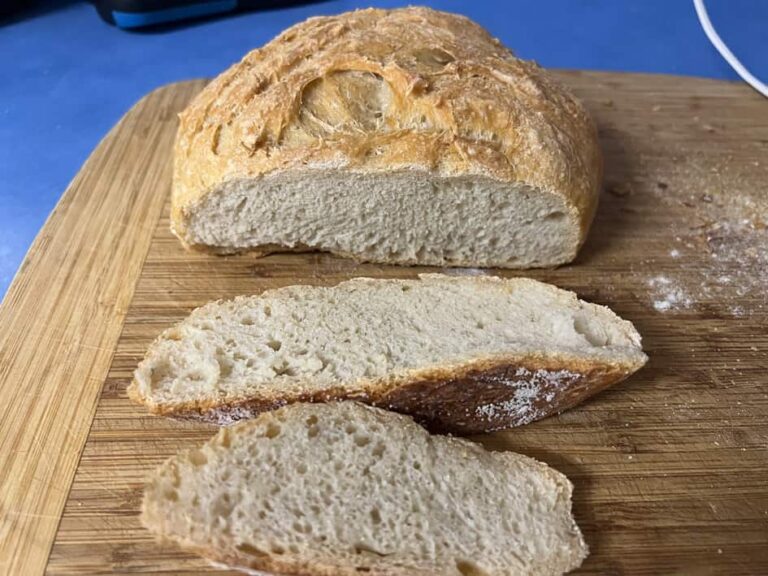
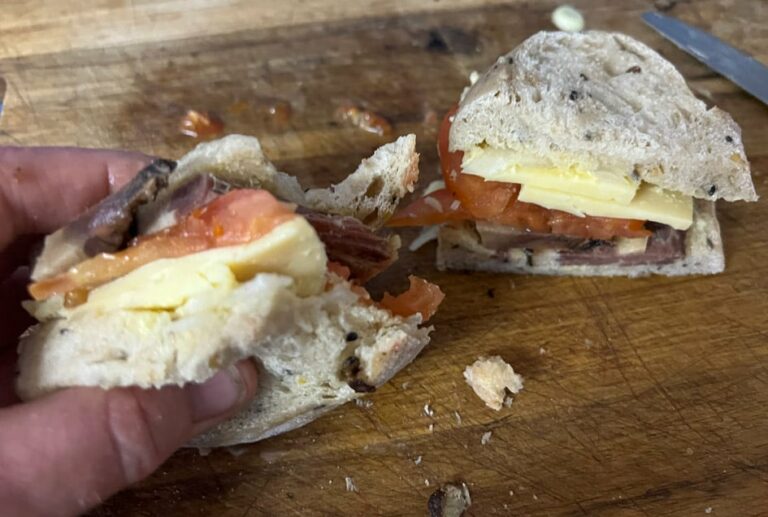
The bread keeps cooking out of the oven so if you can stop temptation and leave the bread on a cake rack for about an hour, it is advised…but if you want to cut into some deliciously yummy sourdough that you only have to add butter to, go for it.
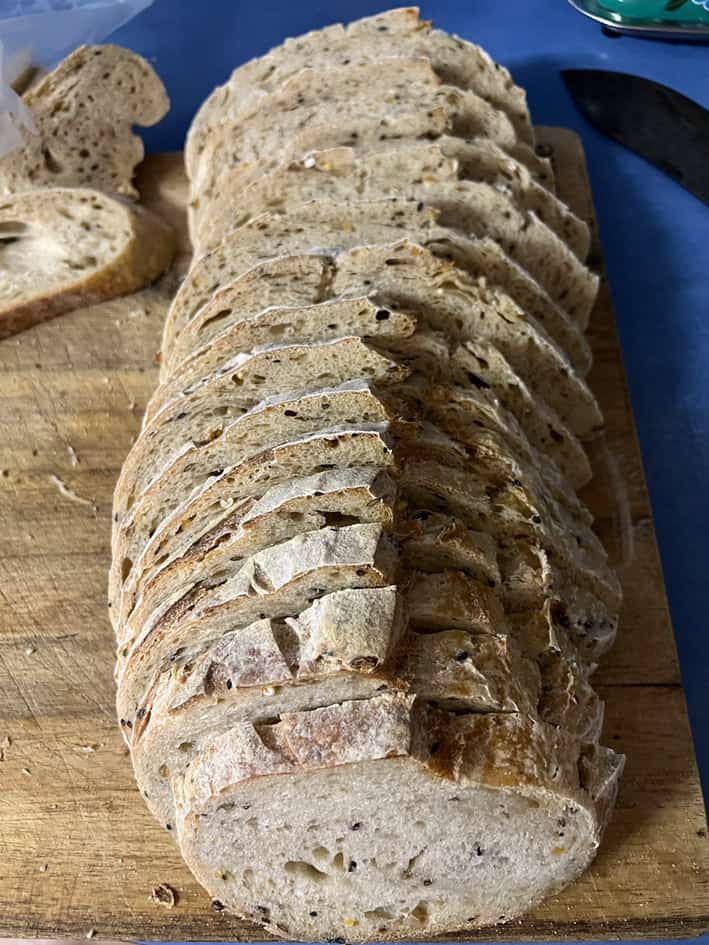
It is truly hard to describe…how good it tastes…for flour, salt, water…a bit of time …back to basics good old fashion, great, healthy food.
Don’t ever store your sourdough bread in the fridge. I keep mine in a calico bag, in a bread bin and if I am not going to use it before it starts going off, I slice it and freeze it. If when part frozen you can separate slices for easy access later.
When you want to use the frozen bread, take out required slices, wrap in tea towel and allow to thaw…or put in microwave if you wish…when thawed it seems as fresh as if just baked.
Taking those seven days to get that starter going is so worth it, in my honest opinion. The fact that my starter was always healthy and strong…and all I had to do is get the recipe right…and I am still using that first from scratch Mother Load…that is rather satisfying.
I am happy to share my Mother Load, which I have done before. I haven’t sent it in the mail yet…but that could be on the cards.
If you purchase a starter sourdough kit from any of the places available in Australia…they will send you dehydrated powdered sourdough starter mixture. If this saves you time, go for it.

I hope this blog helps and all the best with it…believe me if you have wanted to, it is truly worth it…the taste is amazing, and you will be so happy with yourself when you master it.
I would dearly love you to share your results and any tips you found along the way.
Another two good people to follow for great tips and recipes for discard is @maurizio on Instagram or his website The Perfect Loaf https://www.theperfectloaf.com/new-baker-start-here/
and
https://www.pantrymama.com/ who is on Facebook, Twitter and Pinterest
My YouTube video on my sourdough journey